Working with LSPs on Remix IDE
This guide will walk you through the process of building and deploying LSP smart contracts using Remix IDE.
Setting Up Dependencies
First, create a package.json file with the required LSP smart contract dependencies to the root of your project:
{
  "dependencies": {
    "@erc725/smart-contracts-v8": "npm:@erc725/[email protected]",
    "@erc725/smart-contracts": "^7.0.0",
    "@openzeppelin/contracts": "^4.9.3",
    "@lukso/lsp1-contracts": "~0.15.0",
    "@lukso/lsp2-contracts": "~0.15.0",
    "@lukso/lsp14-contracts": "~0.15.0",
    "@lukso/lsp17contractextension-contracts": "~0.15.0",
    "@lukso/lsp20-contracts": "~0.15.0"
  }
}
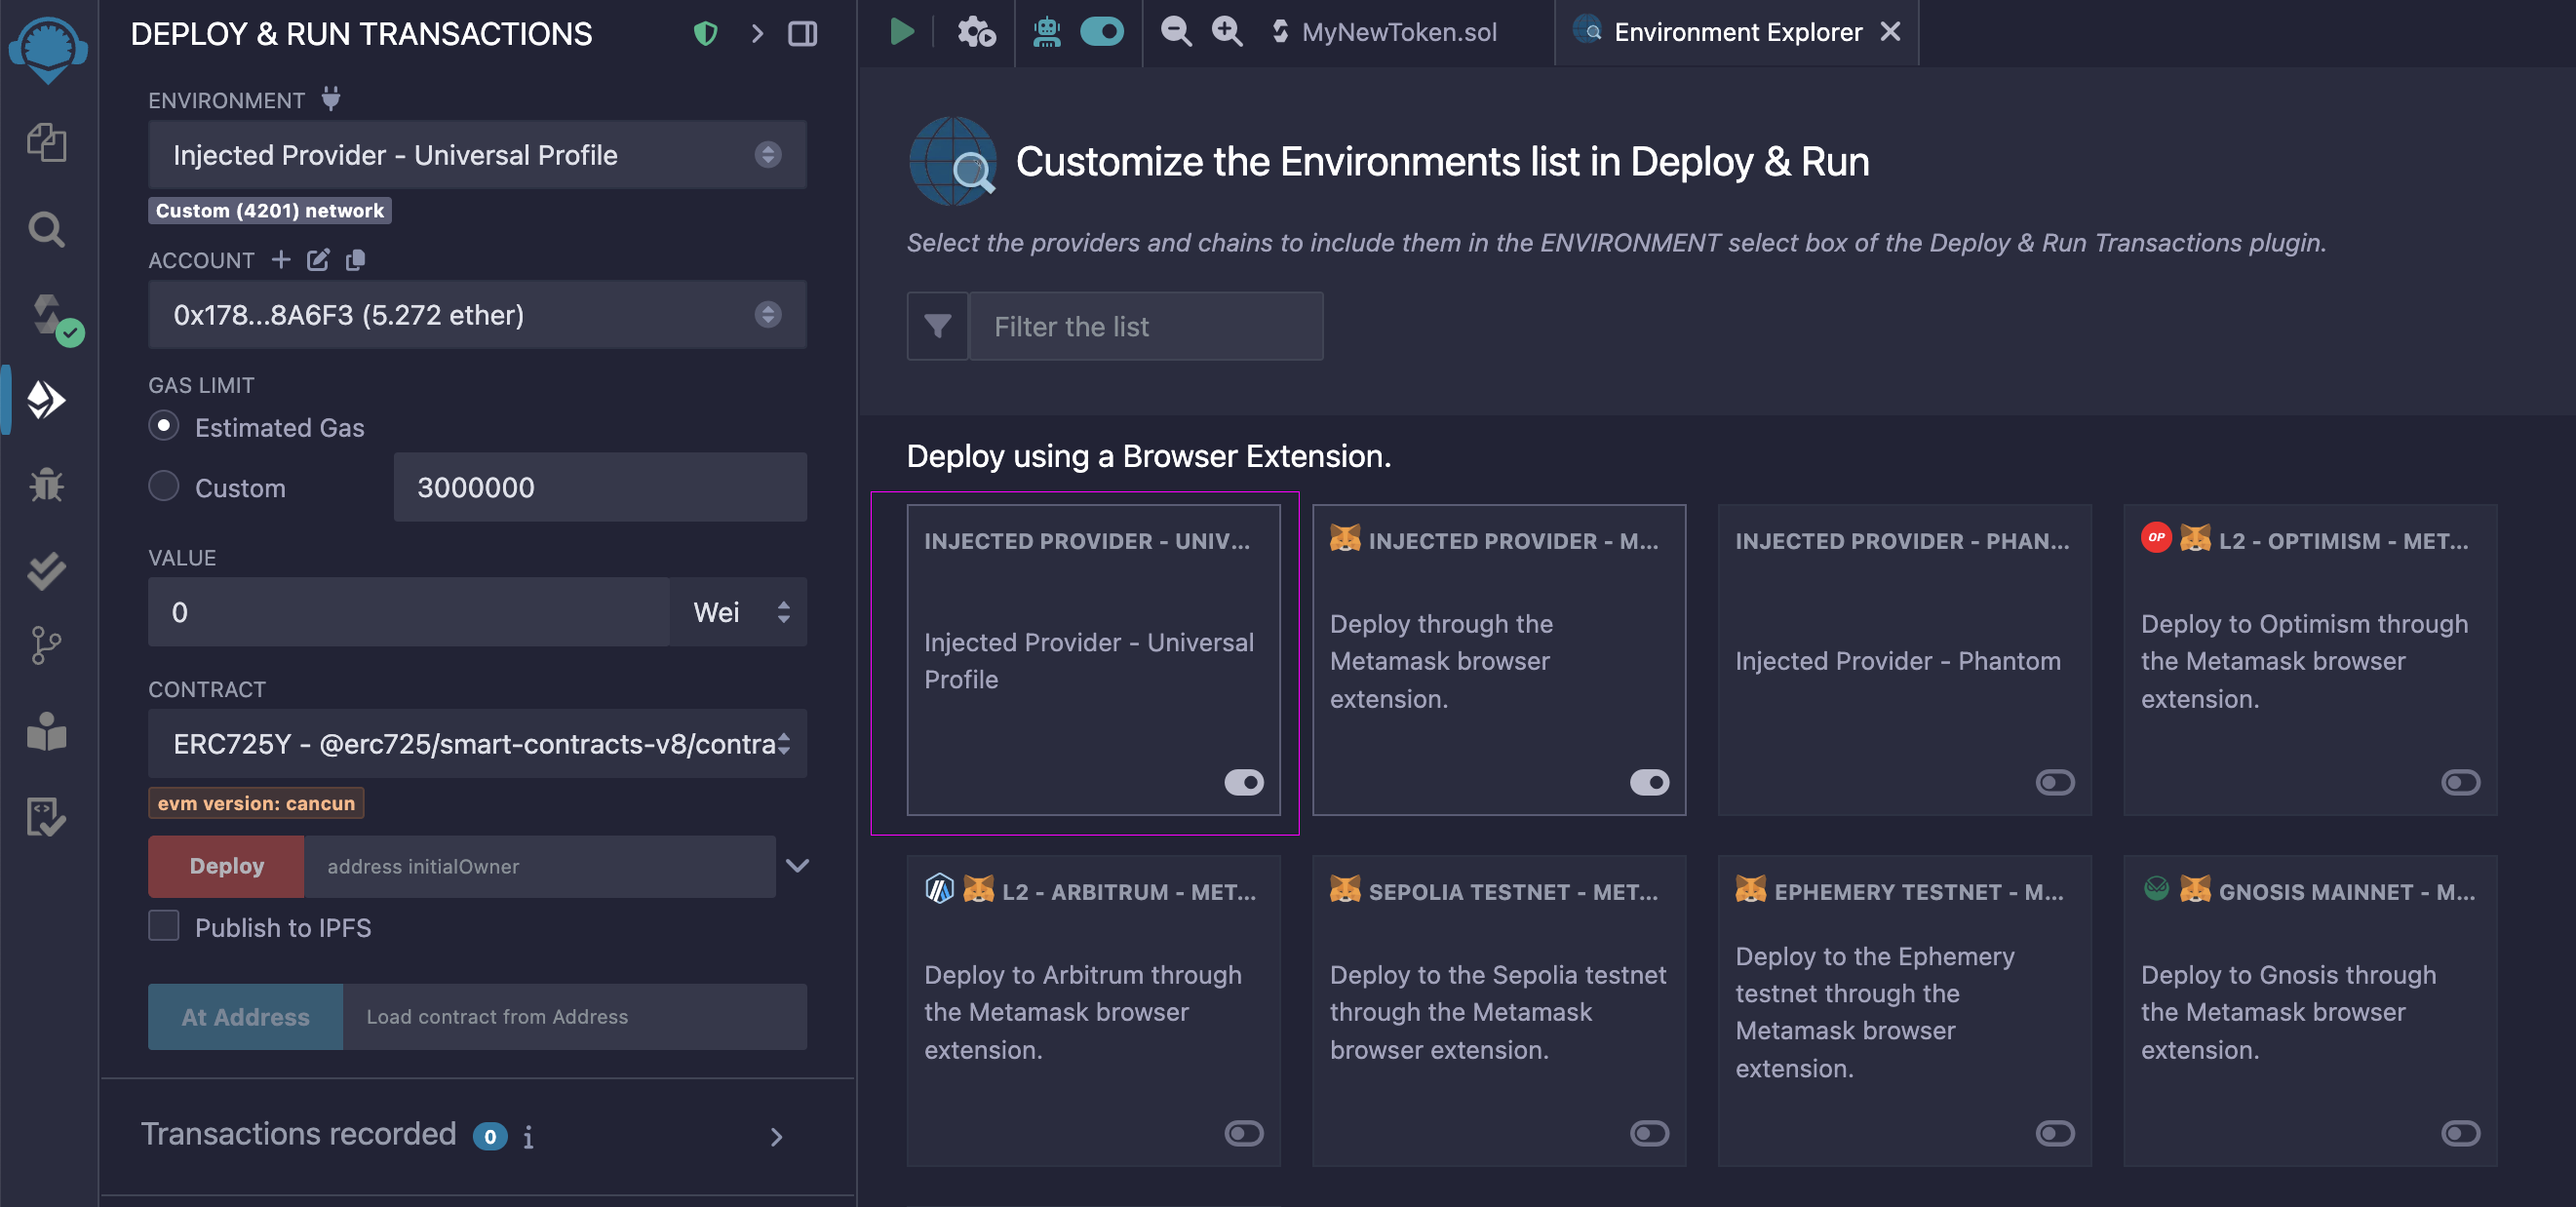
Deploying using the Universal Profile browser extension
To deploy your smart contract using the Universal Profile browser extension:
- Click on the Customize this list option in the Environment field
- Activate the option of Injected Provider - Universal Profile under the Deploy using a Browser Extension.
Verifying the Contract
To verify your contract on the LUKSO Testnet:
-
Enable Contract Verification
- Open the Plugin Manager in Remix
- Activate the Contract Verification tool
- The verification icon will appear in the left menu
-
Configure Blockscout API
- Navigate to the Settings tab
- Add the LUKSO Testnet Blockscout API:
https://explorer.execution.testnet.lukso.network/api
-
Verify Contract
- Go to the Verify tab
- Fill in the following details:
- Chain: LUKSO Testnet (4201)
- Contract Address: Your deployed contract address
- Contract Name: Select your contract's Solidity file
- Enter the same constructor parameters used during deployment
- Ensure Blockscout is selected
- Click the "Verify" button
After verification, your contract will be visible and verified on the LUKSO Testnet explorer.